Blog
Included in NexCite Premium*, the blog tool can be incredibly useful to showcase expertise, share personalized travel tips, and highlight unique destinations or experiences. By regularly posting content, you can build credibility and improve your online visibility through SEO. A well-curated blog also helps establish a travel advisor as a trusted resource, encouraging clients to seek your services for planning and booking trips.
The blog includes the main blog page, where your blog posts will be listed along with a list of categories, categories, used to group your blog posts, and blog post pages, where full blog posts can be accessed.
*The blog feature can be added for NexCite, and NexCite basic users for an additional $5/month.
Creating a Blog Post
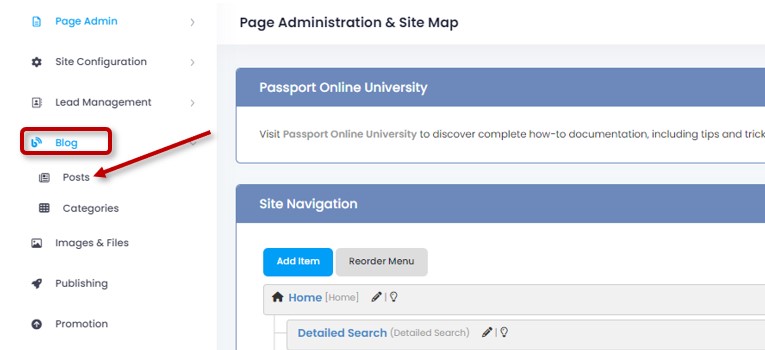
From within your NexCite admin, select Blog, and then posts:
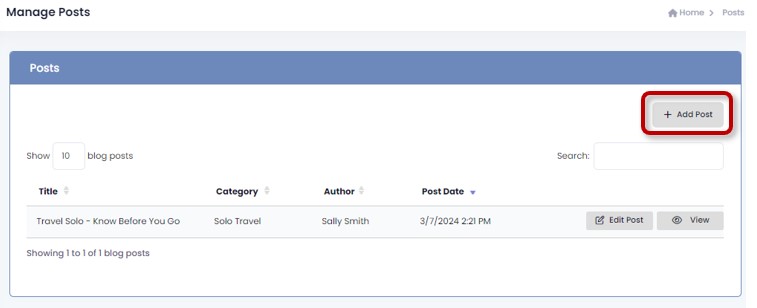
Select Add Post:
Post Settings
When creating a new post, you can attribute certain settings to the post:
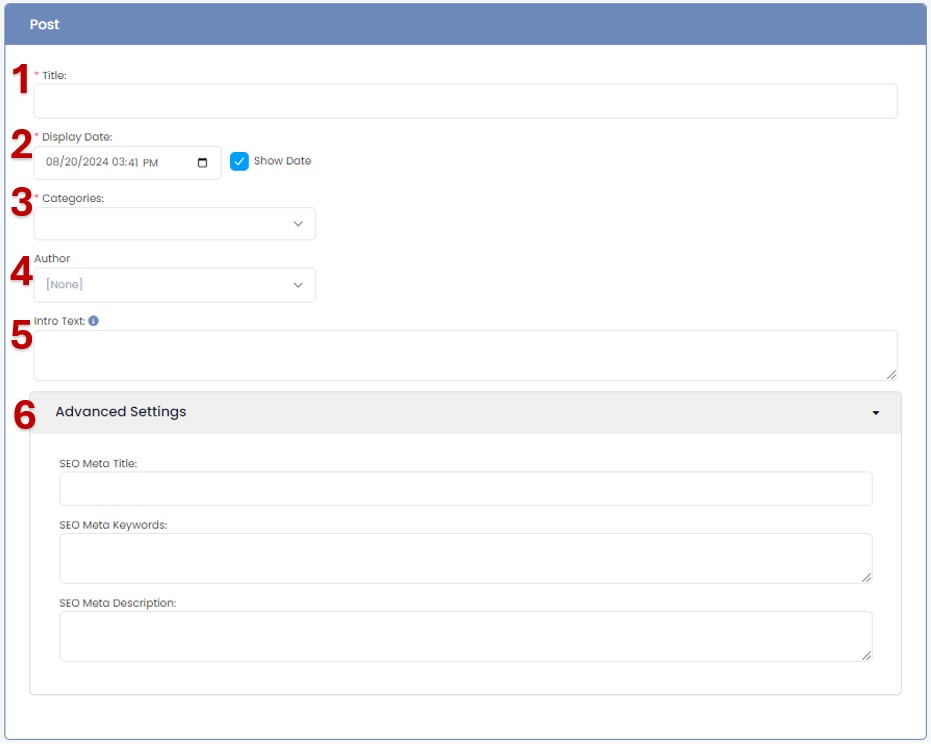
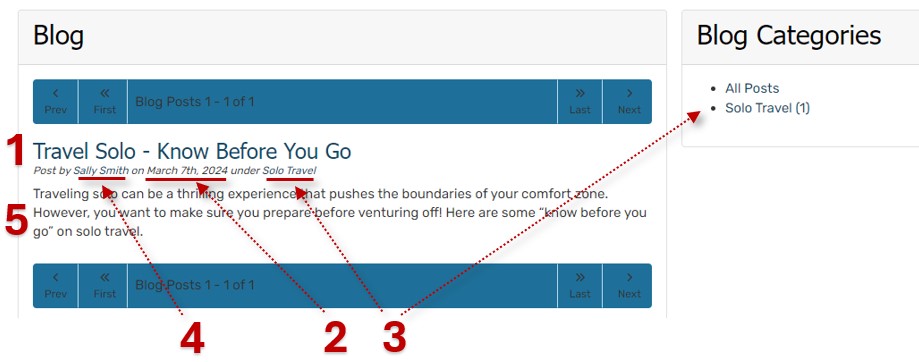
Following is a written description of each field along with an example beneath of where each of the settings will show on the blog selection page:
- Title: This will be the title of your blog post
- Display Date: You can choose to add a display date on the post, or uncheck the Show Date box if you don't wish to display a date
- Categories: You can create and assign categories to your posts here. When viewing the post, site visitors will be able to select from your available blog categories to view blogs that have been assigned that category.
- Author: You can assign an author to the post. A drop-down is provided showing your advisors with AgentPort accounts for quick-select.
- Intro Text: Text entered here will display on the blog selection page.
- Advanced Settings: The advanced settings can be used to set an SEO Meta Title, Keywords, and Description.
Linking to the Main Blog Page, Category or Blog Post
- Adding a Menu item linking to the Main Blog Page, Category, or Blog Post
- Linking to the Main Blog Page, Category, or Blog Post
Adding a Menu item linking to the Main Blog Page, Category, or Blog Post
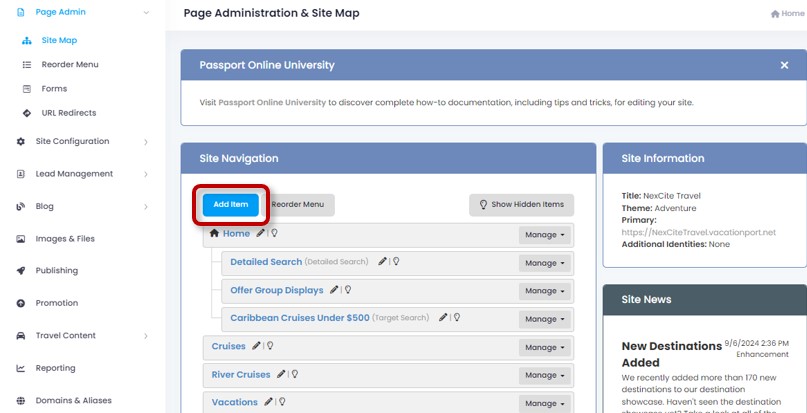
From your Page Administration & Site Map, select Add Item:
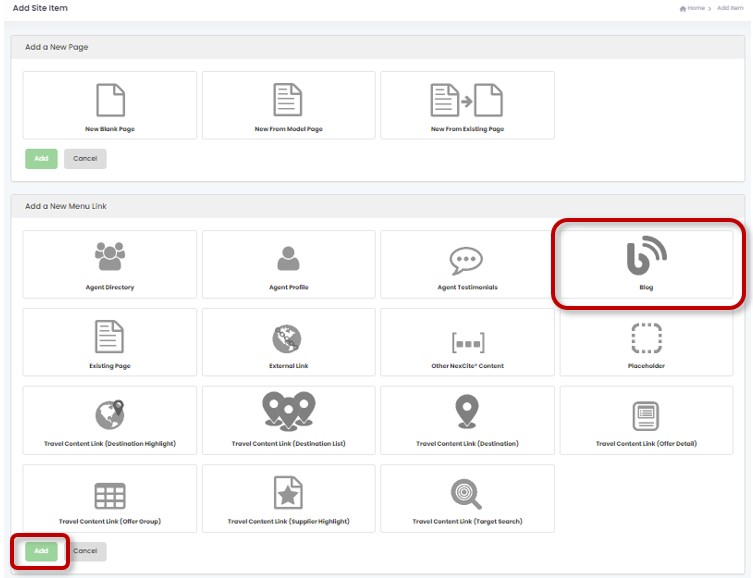
Select Blog from the site items and then select the Add button:
Enter in your desired Link Settings:
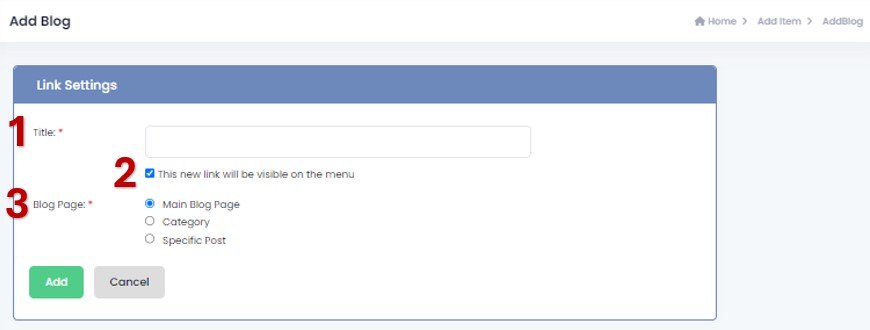
- Title: This will be the title used in your menu for this page
- Visibility: When checked, this item will show in your menu. If unchecked, it will not show in the menu.
- Blog Page:
- Main Blog Page: To link to your main blog page, with the list of all of your recent posts and categories, select this option.
- Category: To link to a category page, where all blog posts assigned to the same category will be listed, select this option.
- Specific Post: If you want to link to one specific posts, select this option.
Note: Selecting Category or Specific post will provide you with a drop-down menu to make your selection from your existing categories or posts.
- Select Add to add your new link to your menu.
Linking to the Main Blog Page, Category, or Blog Post
To link text or an image to one of the blog pages, highlight the text or select the image, then select the link icon. Use the Link Type drop-down to select which blog page to link to:
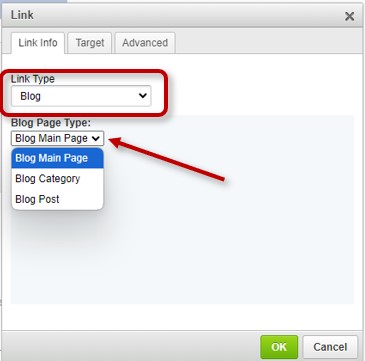
Blog Page Type:
- Main Blog Page: To link to your main blog page, with the list of all of your recent posts and categories, select this option.
- Category: To link to a category page, where all blog posts assigned to the same category will be listed, select this option.
- Specific Post: If you want to link to one specific posts, select this option.
Note: Selecting Category or Specific post will provide you with a drop-down menu to make your selection from your existing categories or posts.
