Groups Model Page
The Groups model page was created to give you a template for adding your own group information (but of course you can use it for something else if you'd like!) Feel free to use as much or as little that comes with the model page.
After adding the model page, you'll be able to edit the specific sections.
Below is an image of the model page with different areas called out. See the number beneath the image to get information on change that specific portion of the page.
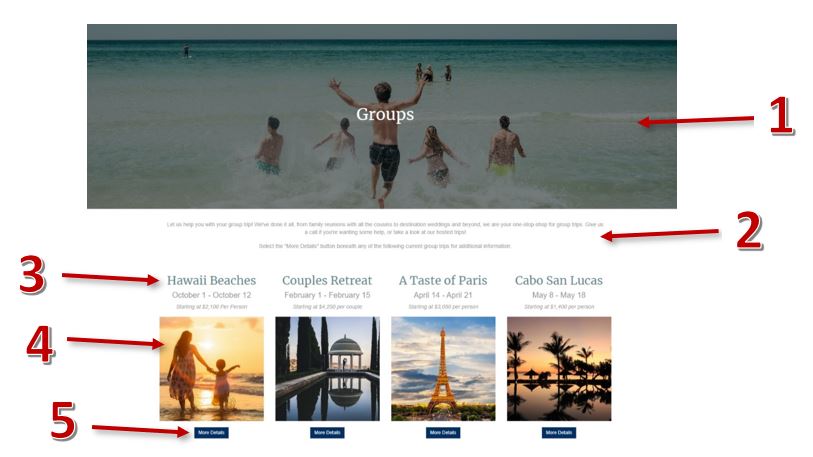
- Change the image used for the top of the page. You'll use the Advanced Options portion of the text block to do that. More information can be found here. You'll want to use a larger format image, as it will stretch the full width of the page. The image we used was 1920 x 1280 pixels. Additional code has been added to the text block to keep the "Groups" text at the middle of the block, but you can change that text as well.
- Edit the page intro text. Be sure to edit the text as the model page will come with placeholder text only.
- Change the Group Title, Dates, and lead-in price.
- Change the image used for a specific group. First, upload your own image. Then, double click on the image within the section to open the image properties, and select the image you uploaded. In our model page, we used square images that were 800 x 800 pixels. We recommend making sure the images you use are all the same size as eachother, but they don't have to be square like the examples in the model page.
- Add a link to the button. If you've created another page for with the group details (like the Group model page), add a link to the button to go to that page. If you are using a PDF with the trip details, upload your PDF to your images and files, and then link the button to that PDF.